Create CloudFront for Backend (ALB)
Create a CloudFront Distribution for the Backend
ℹ️ Objective
- Amazon CloudFront is a Content Delivery Network (CDN) service that helps speed up and secure web applications.
- In this step, we will create a CloudFront distribution to act as the public “gateway” for our backend API, instead of allowing users to access the ALB directly.
- Key Benefits:
- HTTPS: CloudFront will provide a secure HTTPS endpoint for users. It will communicate with the ALB over HTTP within the AWS internal network, simplifying SSL certificate management.
- Performance: CloudFront brings your API closer to users through its global network of Edge Locations, reducing latency.
- Security: It provides an additional layer of protection, hiding the ALB’s actual address, and can be integrated with AWS WAF (Web Application Firewall) later.
🔒 Steps to Follow
1. Start Creating the Distribution
- From the AWS Management Console, search for and select the CloudFront service.
- Click on Create a CloudFront distribution.
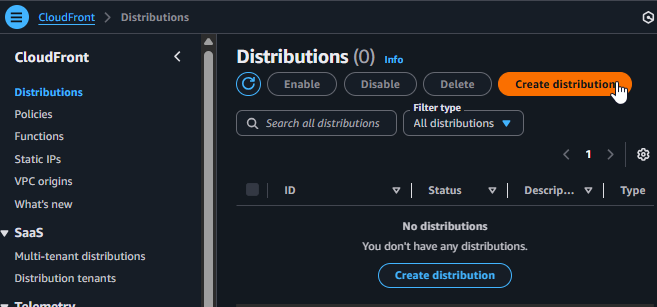
Start creating a CloudFront Distribution
2. Configure the Origin
- Origin domain: Click in the box and select the DNS name of the Application Load Balancer
ors-albfrom the dropdown list. - Protocol: Select
HTTP only. - HTTP port: Leave the default as
80.
How it works:
User --(HTTPS)--> CloudFront --(HTTP, port 80)--> ALB.
CloudFront will handle the secure HTTPS connection, and then “talk” to the ALB using regular HTTP.
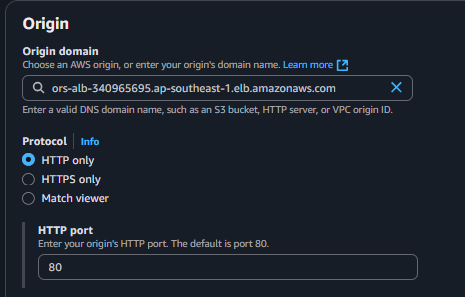
Configure the Origin as the Application Load Balancer
3. Configure the Default Cache Behavior
- This is the most critical configuration part to ensure the API works correctly.
- In the Behaviors tab, select
Default (*)and click Edit. - Cache policy: Select
CachingDisabled. This is very important because we do not want CloudFront to cache API responses (which are dynamic and change frequently). - Origin request policy - optional: Select
AllViewer. This policy forwards all information from the user (headers, query strings, cookies) to the ALB, ensuring the backend receives all the data it needs to process requests. - Web Application Firewall (WAF): Select
Do not enable security protectionsfor the purpose of this workshop. - Click Save changes.
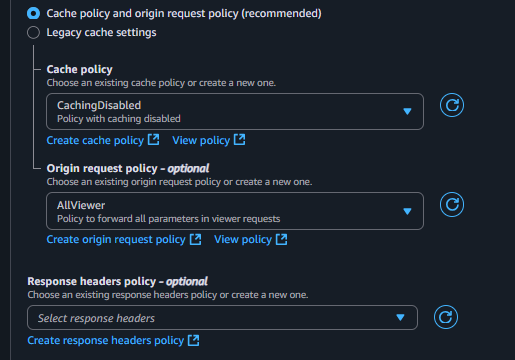
Configure the Cache Behavior for the API
4. Finalize, Deploy, and Test
- Scroll to the bottom of the page and click Create distribution.
- The process of deploying a new distribution across CloudFront’s entire network can take 5 to 15 minutes. You will see the status as
Deploying.
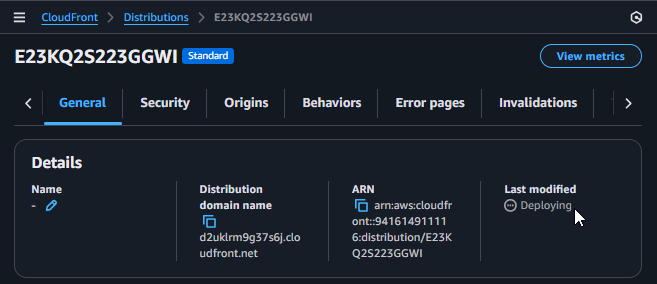
Wait for CloudFront to finish deploying
- When the status changes to show a Last modified date, copy the Distribution domain name (e.g.,
d12345abcdef.cloudfront.net).
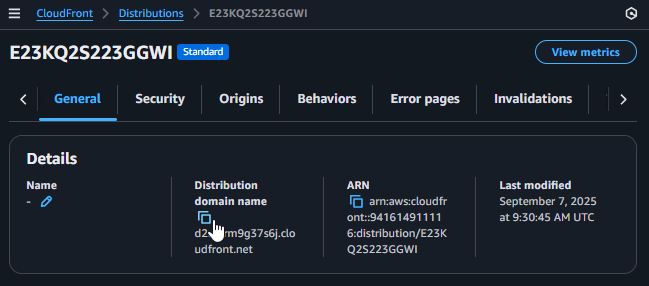
Copy the Distribution Domain Name
- Paste this domain name into your browser. The response should be identical to when you accessed the ALB’s DNS:
Welcome to Dining Verse Backend API!. This confirms that CloudFront has been successfully configured to act as a proxy for your ALB.