Modify Public Subnet
Configure Auto-assign Public IP for Public Subnets
ℹ️ Objective
- Enable the feature to automatically assign a Public IP address to EC2 instances launched in the Public Subnets.
- This is a mandatory step so that we can access and configure the initial server from the Internet via SSH.
🔒 Steps to Follow
1. Access the Subnet Management Page
- From the VPC Dashboard interface, select Subnets from the left menu to view the list of all subnets belonging to your
ors-vpc.
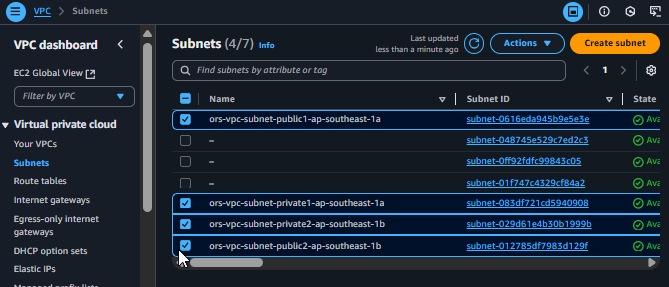
List of Subnets for ors-vpc
2. Edit the First Public Subnet
- Identify and select one of the two created Public Subnets (e.g.,
ors-vpc-subnet-public1-ap-southeast-1a). - Click the Actions button and select Edit subnet settings.
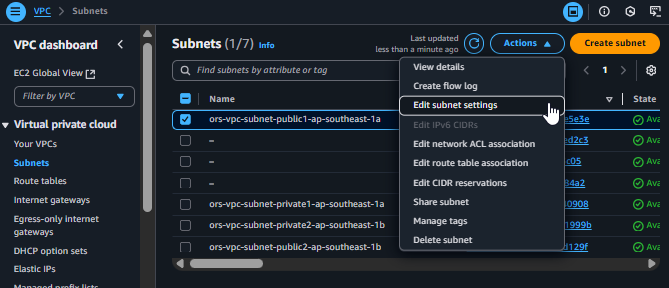
Select Edit subnet settings
3. Enable the Auto-assign IP Feature
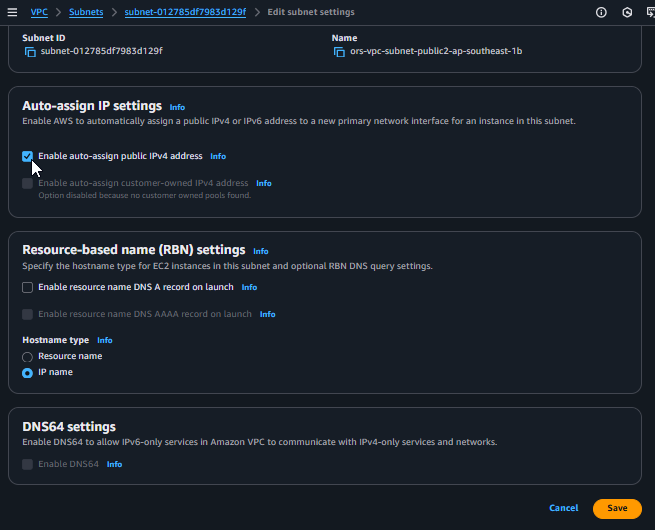
- On the Edit subnet settings page, find the Auto-assign IP settings section.
- Check the box for Enable auto-assign public IPv4 address.
- Scroll down and click Save to apply the changes.
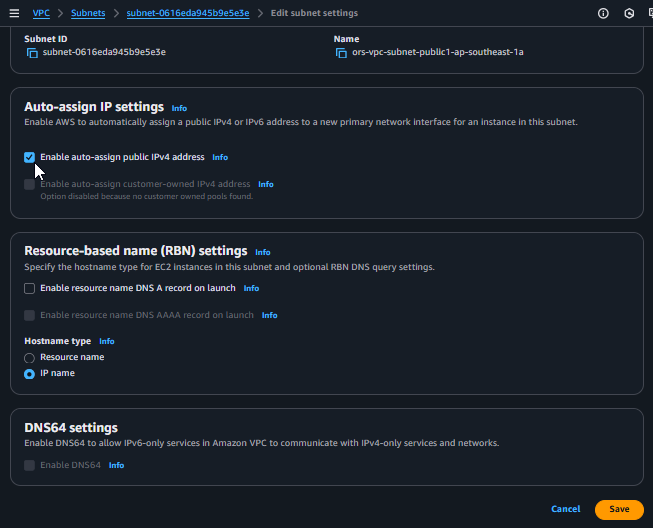
Enable the Auto-assign Public IP feature
When this feature is enabled, any EC2 instance launched in this subnet will automatically receive a public IP address, allowing it to communicate with the Internet.
4. Repeat for the Remaining Public Subnet
- Repeat steps 2 and 3 for the second Public Subnet (e.g.,
ors-vpc-subnet-public2-ap-southeast-1b). - This ensures that our system can operate uniformly across both Availability Zones, maintaining high availability.
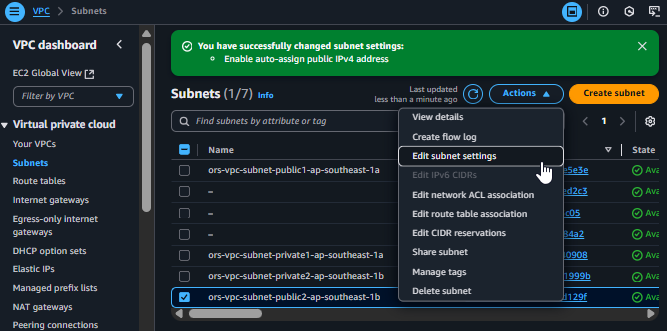
Complete the configuration for both Public Subnets