Create the Initial EC2 Instance
Launch an Initial EC2 Instance for Configuration
ℹ️ Objective
- Launch a first virtual server (EC2 Instance), named
ors-ec2. - This server will be placed in a Public Subnet so that we can access it to install the environment (Node.js, Git, etc.) and configure the application.
- Once completed, this instance will be used as a “blueprint” to create an AMI (Amazon Machine Image) for automatic scaling later on.
🔒 Steps to Follow
1. Start Launching the Instance
- In the AWS Management Console, find and select the EC2 service.
- From the EC2 Dashboard, click the Launch instance button.
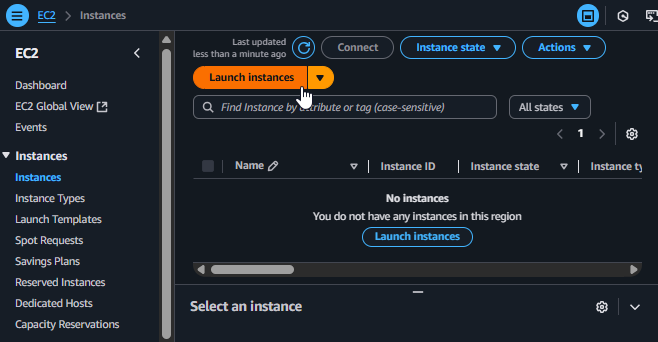
Start Launch Instance from the EC2 Dashboard
2. Name the Instance and Choose an AMI
- Name:
ors-ec2 - Application and OS Images (Amazon Machine Image): Choose Amazon Linux. This operating system is optimized for AWS and is highly compatible with the tools we will be using.
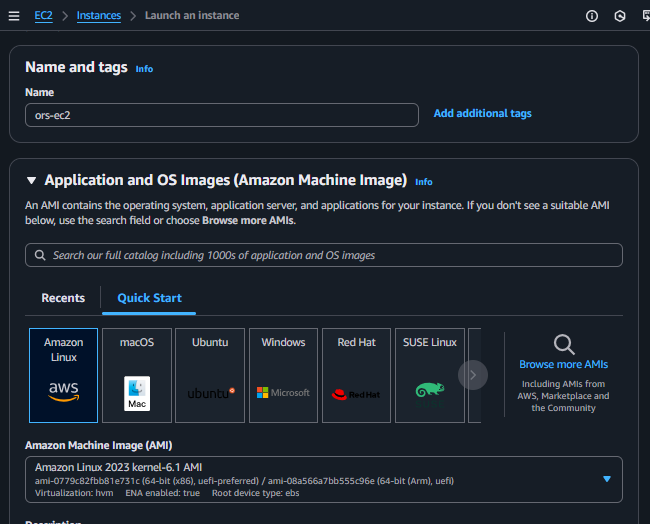
Name the instance and select an Amazon Machine Image
3. Choose an Instance Type
- Instance type: Select
t2.micro. This instance type is part of the AWS Free Tier, making it suitable for learning and development.
4. Create a Key Pair for Access
- This is an extremely important step to be able to connect to the server via SSH.
- In the Key pair (login) section, click on Create new key pair.
- Key pair name:
ors-keypair - Key pair type:
RSA - Private key file format:
.pem(for use with MobaXterm or Terminal on macOS/Linux). - Click Create key pair, and the browser will automatically download the
ors-keypair.pemfile.
IMPORTANT: Store this .pem file in a safe place and never share it. You cannot download this file a second time. If you lose it, you will lose access to your EC2 instance.
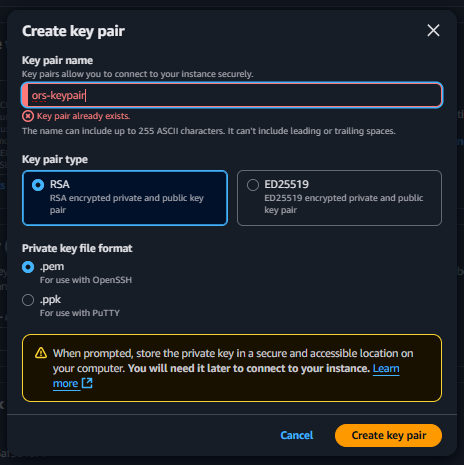
Create a new Key Pair for secure access
5. Configure Network Settings
- Click the Edit button in the Network settings section.
- VPC: Select the
ors-vpcyou created. - Subnet: Choose one of the two configured Public Subnets (e.g.,
ors-vpc-subnet-public1-ap-southeast-1a). - Auto-assign public IP:
Enable. (This is why we configured the subnet in step 2.2). - Firewall (security groups): Choose Select existing security group.
- From the Common security groups list, select
ors-sgwhich we created in step 2.3.
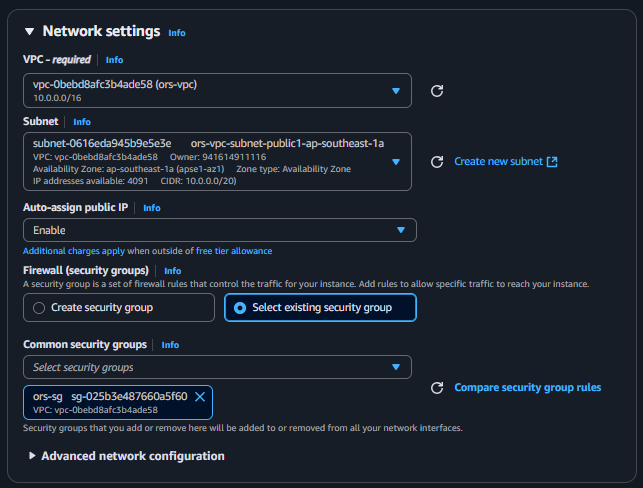
Configure detailed network settings for the EC2 instance
6. Launch and Check the Instance
Review the configured information in the Summary panel on the right.
Click Launch instance.
After a successful launch, you can click View all instances to see your
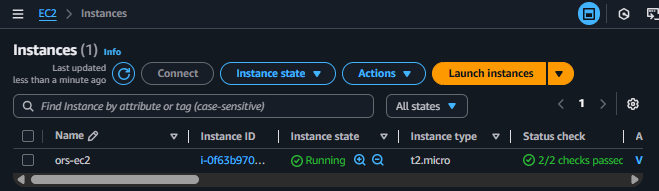
ors-ec2server.Wait a few minutes until the Status check column changes to 2/2 checks passed. At this point, your server is ready to be connected to.