Create RDS MySQL Database
Initialize the Database with Amazon RDS
ℹ️ Objective
- Create a managed MySQL database using the Amazon RDS service.
- Place this database within the created VPC (
ors-vpc) network environment and protect it with a Security Group (ors-db-sg). - Use the Free Tier to save costs during this hands-on workshop.
🔒 Steps to Follow
1. Access the RDS Service
- From the AWS Management Console interface, search for and select the RDS service.
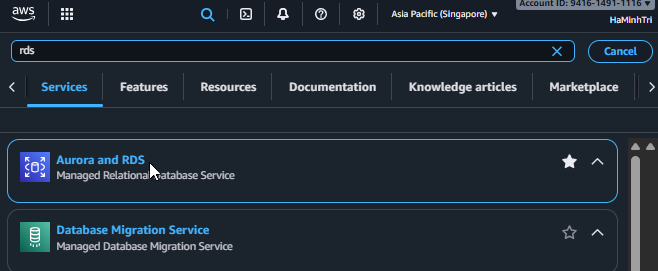
Search for the RDS service
2. Start Creating the Database
- In the RDS Dashboard, click the Create database button.
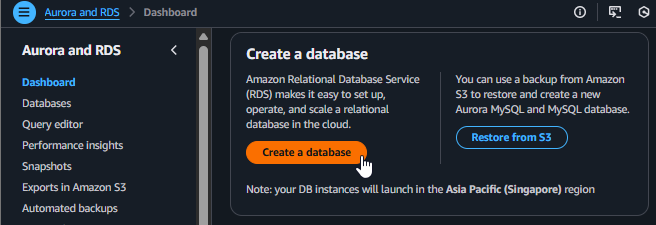
Click Create database
3. Configure Engine and Template
- Choose a database creation method: Select Standard create.
- Engine options: Select MySQL.
- Templates: Select Production.
Choosing Free tier will automatically limit the configuration options (e.g., you can only select a Single DB instance) to ensure you do not incur unexpected costs.
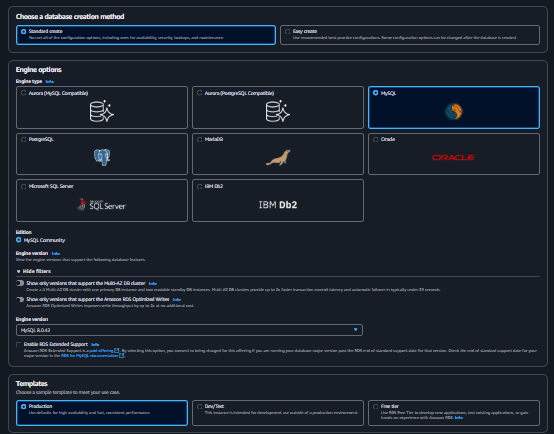
Select Standard create, MySQL, and Free Tier
4. Configure Settings
- DB instance identifier:
ors-db - Master username:
admin - Master password: Enter your password (e.g.,
0812-haminhtri). - Confirm password: Re-enter your password.
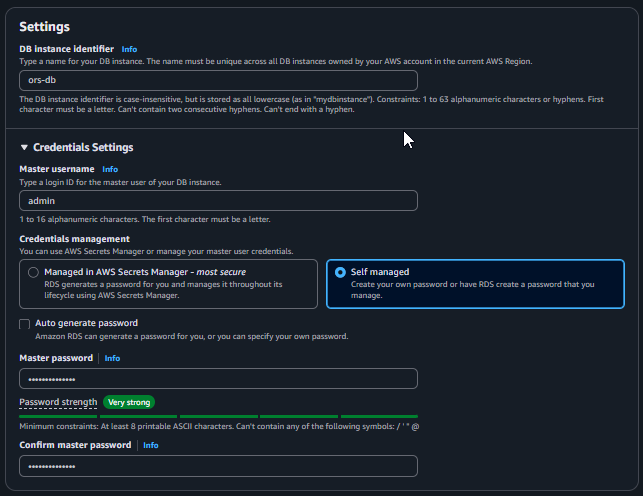
Configure login credentials for the Database
5. Configure Connectivity
This is a crucial step to place the database in the correct network environment.
- Virtual private cloud (VPC): Select
ors-vpc. - DB Subnet Group: Leave the default; AWS will automatically create a new Subnet Group suitable for your VPC.
- Public access: Select Yes.
- VPC security group (firewall): Select Choose existing.
- Existing VPC security groups: Keep the
defaultSecurity Group and selectors-db-sg.
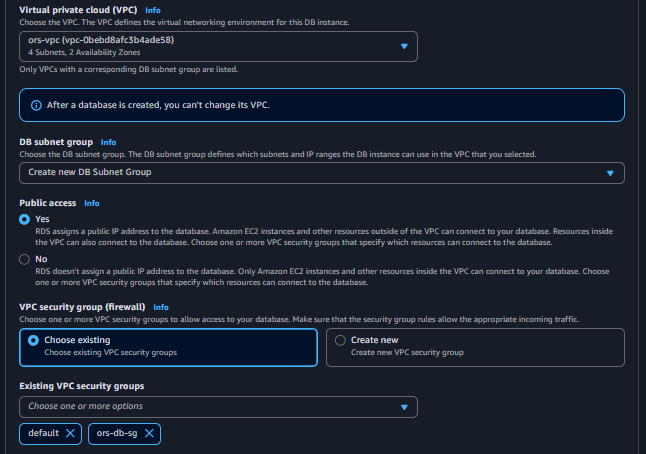
Configure network connectivity for RDS
6. Configure Additional Configuration
- Expand the Additional configuration section.
- Initial database name:
ors - This is the initial schema name that the application will use.
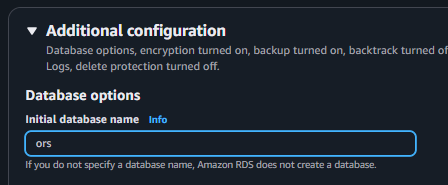
Set the initial schema name
7. Finalize, Create, and Check
- Scroll to the bottom and click Create database.
- The database initialization process can take 5 to 10 minutes. Please wait until the Status column changes to Available.
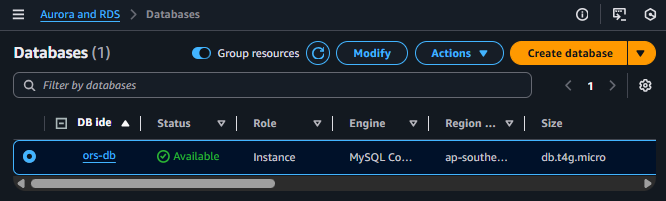
Wait for the Database to be created
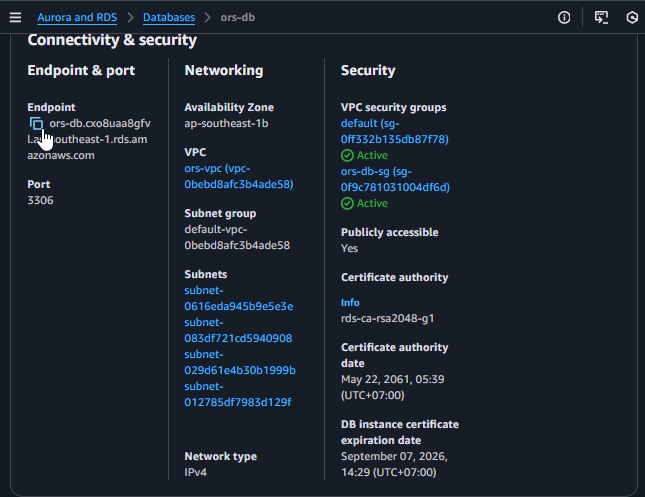
- Once completed, click on the newly created
ors-dbinstance. - In the Connectivity & security tab, find and copy the Endpoint value. This is the address used to connect to your database.