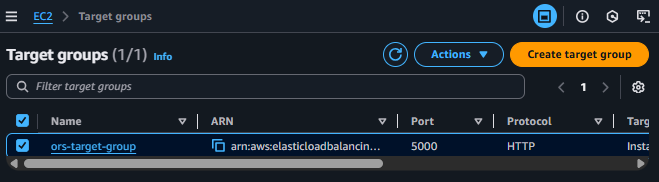
Create Target Group
Create a Target Group
ℹ️ Objective
- A Target Group is used to group together EC2 instances that the Application Load Balancer (ALB) will route traffic to.
- The ALB also uses the Target Group to perform Health Checks, ensuring that it only sends requests to instances that are operating normally.
- We will create a Target Group to manage all the web servers for the restaurant project.
🔒 Steps to Follow
1. Access Target Groups
- From the EC2 Dashboard, on the left menu, scroll down to the Load Balancing section and select Target Groups.
- Click on Create target group.
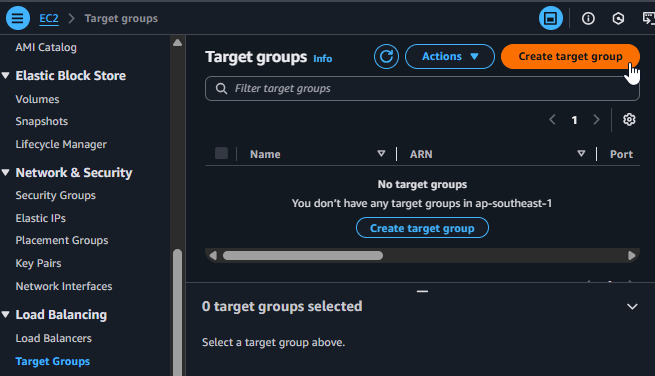
Start creating a Target Group
2. Choose a Target Type
- In the Choose a target type step, select Instances, as we want the Load Balancer to route traffic to EC2 instances.
- Click Next.
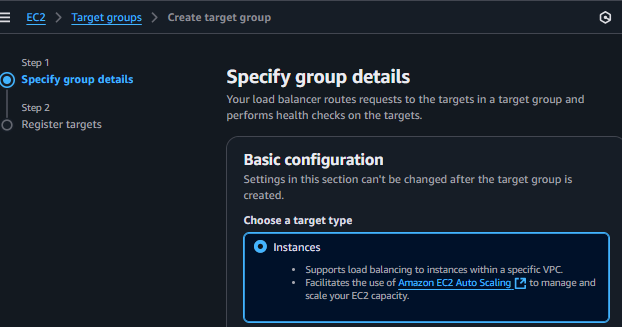
Select Instances as the Target Type
3. Configure Details for the Target Group
- Target group name:
ors-target-group - Protocol - Port: Select
HTTPand enter5000. This is the port our Node.js backend application will be listening on. - VPC: Select
ors-vpc. - Health checks:
- Health check protocol:
HTTP - Health check path:
/health.
- Health check protocol:
What is a Health Check Path?
This is a special endpoint that you need to create in your backend code. The Application Load Balancer will continuously send requests to this /health path. If it receives a successful response (HTTP 200 OK), it will consider the instance “healthy” and continue sending user traffic to it. If not, it will temporarily stop sending traffic to allow the instance to recover.
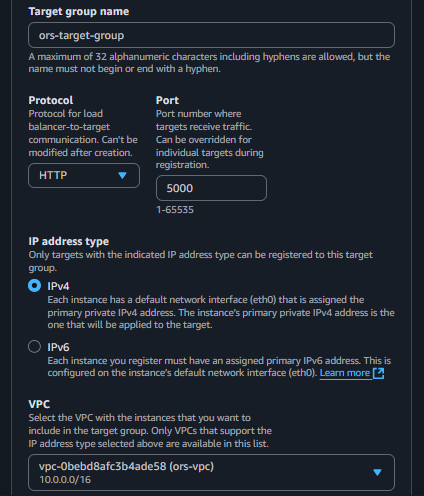
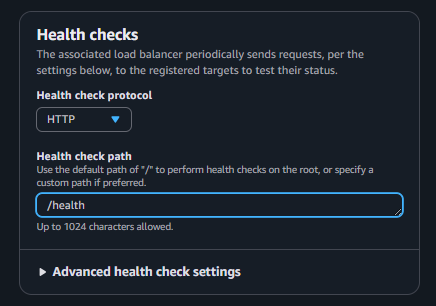
Enter the configuration details for the Target Group
4. Register Initial Targets
- In this step, we will register the manually created
ors-ec2instance into the Target Group. - In the Available instances table, select
ors-ec2. - Click on Include as pending below. This action will add the instance to the pending list to be registered with the group.
Why register an initial instance? This helps us verify that the Load Balancer and Target Group are working correctly right after configuration. Instances created later will be automatically registered into this Target Group by the Auto Scaling Group.
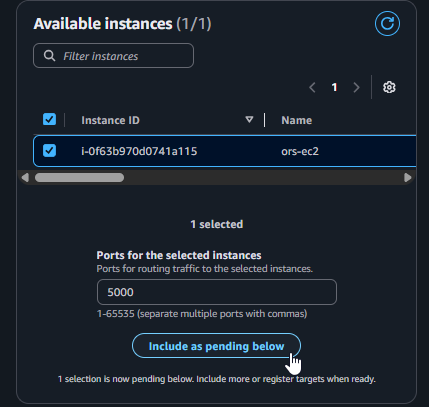
Register the ors-ec2 instance into the Target Group
5. Finalize and Review
- Scroll down and click Create target group.
- After successful creation, you will be taken to the details page of the Target Group. Initially, the Health status of the instance might be
initialorunhealthy. - Please wait a few minutes for the Load Balancer to perform its health checks, and the status will change to
healthy.